
Homemade yogurt & butter

About six years ago we started getting a raw milk share from a local farm in Vermont, a half-gallon a week, a habit we continued when we came back to Buffalo in 2012. It’s legal for dairy farmers to sell a certain quantity of raw milk directly from their farms in Vermont, but it’s illegal in New York to sell it at all. They’ll raid the offending dairy all Elian Gonzales style with AK-47s and dump out tanks of milk if they catch a farmer selling it in NY. Don’t even get me started on how freakin’ backwards that is.
Anyway, the first time we got our half-gallon Ball jar of white wonder, we realized we were dealing with a whole different thing here. First off, raw milk isn’t homogenized, meaning there’s a layer of heavy cream a few inches thick sitting on top of the milk. That cream layer will be bigger and and sweeter in the spring when the pastured cows get their faces into the new, green grass, and smaller and mellower in the winter when they’re fed silage. Skim the cream off, and you’re left with skim milk (yes, this was a revelation to me). Shake the jar up to incorporate the milk and cream, and you have whole milk. And the milk actually tastes like milk, unlike the grayish skim crap I had been buying. We met a lot of families whose kids didn’t like milk from the store, but couldn’t get enough of the raw, real stuff.
There were a few weeks at the beginning when we didn’t use all of the milk before it spoiled, and I felt pretty guilty about it. After all, an actual farmer milked a cow to get this stuff, and it sure wasn’t cheap. So I did some poking around, went to some free classes at the local co-op, and learned how to turn this liquid gold into some pretty mindblowingly delicious treats. Real cream butter that tastes like nothing else you’ve ever had. Yogurt and cream cheese that don’t have a bunch of added crap in them. And none of it takes more than 10-15 minutes of active work!
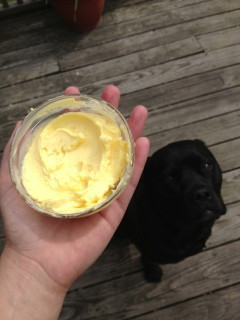
Pretty, yellow butter (and a dog who REALLY wants some).
How to Make Butter
If you have raw or non-homogonized milk, use a little ladle to skim off the cream layer from the top of the milk; it’s ok if a little milk gets in there, too. Heavy cream works as well, but won’t turn into yellow butter the way milk from cows raised on pasture will. Put the cream into a blender and then check out this post (she does such a good job showing you what things are supposed to look like that I’m not going to even bother trying to re-invent her awesome wheel).
It’s incredibly easy – you just let the blender run until the butter curds separate from the liquid whey, scoop the curds out and wad them into the ball, pour out the whey, put the butter and some ice water back in the blender to rinse the curds, scoop out the butter again, and you’re done. I can’t stress enough how worth it this is.
How to Make Yogurt
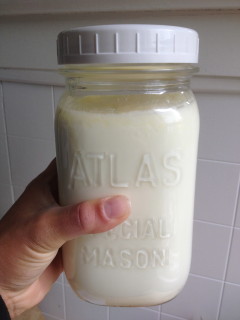
This is a quart of freshly made yogurt. If you look carefully, you can see the cream layer on top (which you’ll pay big bucks for in the store). Pure heaven, that stuff is.
Ingredients:
4 cups (1 quart) milk
1/4 cup plain yogurt with live, active cultures, at room temp
Gear:
medium-sized, heavy-bottom pot
stirring spoon
candy thermometer
quart-sized mason jar with lid
1) Heat milk to 185 degrees (about 10-15 minutes) over medium heat, stirring frequently to prevent scorching. The edges will start to froth and the milk will smell sweet when you’re approaching the right temperature. Make sure the thermometer doesn’t touch the bottom of the pot
2) Cool the milk quickly (over about 5 minutes) to 110 degrees by placing the whole pot into an ice water bath in the sink; the water/ice should come about halfway up the side of the pot. Stir occasionally while you’re watching the temperature.
3) Whisk in the yogurt starter so it’s completely and evenly distributed in the milk.
4) Pour the mixture into the mason jar making sure any yogurt clumps from the pot make it into the jar.
5) Hold the jar at 100 degrees for 8-12 hours. The longer you hold it, the firmer it will be. Keep the jar completely still while it’s incubating. Some ways to keep the jar at temp:
- Wrapped in towels in a small cooler – this is the way I prefer to do it
- In the oven with a pilot light on
- Wrapped in a sleeping bag
- In hot water in the sink (keep refilling the hot water)
- In a thermos (pour the milk into a clean thermos instead of the jar)
- In a crock pot on low
6) Refrigerate finished yogurt
Flavorings like vanilla and sugar, berries, etc. can either be added after the starter (make sure they’re warm), or after the yogurt is finished. Or you can make individual fruit-on-the-bottom cups with jam. And if you want to go a step further with your yogurt…
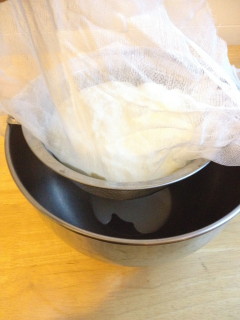
This yogurt has been in the strainer for less than two minutes and the whey is already draining out.
Greek Yogurt & Cultured Cream Cheese
Line a strainer or colander with a double layer of cheesecloth. Spoon in the yogurt you just made or plain yogurt from the store and let it drain in the fridge. In about 6-8 hours you’ll have thick, Greek yogurt in the cheese cloth and a pool of whey in the bowl. Spoon it into a container and refrigerate.
If you let it drain for 12-14 hours, you’ll end up with what is essentially thick cream cheese with a little tang to it (minus all the thickeners in store-bought cream cheese, and plus the probiotics of yogurt). At this point you can go either savory or sweet with it. Transfer to a bowl and stir in desired flavorings (e.g. salt, chives, chopped roasted red peppers, sugar, lemon zest, etc.). I freakin’ love this stuff with salt and fresh herbs on a dark pumpernickel toast.
And don’t throw out the whey! It can be added to bread recipes for a little extra density, blended into smoothies for some probiotic protein, or added by the tablespoon full to lacto-fermented pickles to speed up the fermenting process by a day or two. It can be used in a natural anti-inflammatory drink that uses whey and turmeric. Whey also freezes well, so you can do any of those things a different day.