
Raising the raised beds

Two houses, two sets of orderly raised beds.
The first house, half a duplex on a corner lot in Burlington, Vermont, had a backyard full of leaded soil. Probably a combination of peeling paint from 110-year-old siding and the trash burned by generations of the family who lived there before us (as we’re told). The lead levels were so high – industrial, in fact – that the University of Vermont had to send our soil samples to the federal EPA to get an accurate reading. So, raised beds (pictured above).
The second house, in Buffalo, New York, presented a large, tulip-planted back yard overshadowed by three gigantic black walnut trees whose roots leech chemicals into the soil that are toxic to nightshades – the very tomatoes, peppers, and eggplants we plant annually. More beds.
So twice in five years we built a series of raised bed gardens to safely grow the scores of veggies and herbs we insist on rearing every year. Read: we’ve gotten pretty good at this shit.
BUT, you don’t need crappy soil to build a raised bed. Ours feature a permeable membrane between the raised bed soil and the dirt below it, which prevents plant roots from reaching down into contaminated soil but lets water drain through. But, if your soil is fine, you can eliminate the fabric layer and still take advantage of the benefits of raised bed planting:
- Because the nutrients are confined in a box and don’t disperse as readily through surrounding soil, you can plant more intensively (read: closer together). This allows you to plant more in a smaller space, an ideal situation in urban or rental spaces. You will need to fertilize partway through the season.
- When the plants are spaced closer together, their leaves overlap more and block out the sun to the weeds growing below them. This cuts weeding down significantly.
- That overlapping canopy also reduces the amount of moisture that evaporates from the soil, which cuts the amount of watering needed as compared to an open, flat garden.
- The close proximity of the plants makes harvesting easier. Just park your behind on the edge of a bed and reach everything that’s ready without much movement. Raised beds are something to consider if you’re gardening with someone who has mobility issues, for sure.
Here’s how we do it:
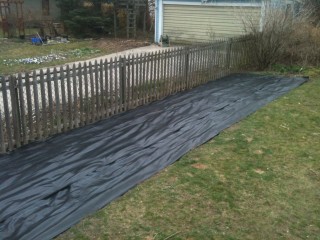
Roll out the landscape fabric to cover an area just larger than the footprint of your beds.
1. Select a relatively flat, well-draining, sunny, water-able part of your property. If rain pools excessively, fill in any low areas with soil to level it off. A concrete pad is fine; blacktop may be too hot. Most veggies require around 8 hours of sunlight, so eyeball the space in the summer months to make sure it gets enough light. Level out the area as best you can so wooden bed frames can rest on the ground without teetering. The spot should be accessible by hose or a short walk with a watering can.
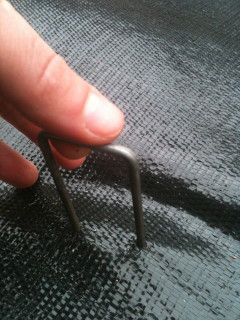
Poke earth staples through to keep the fabric down.
2. If you have bullshit soil (i.e. full of lead, under-run with black walnut tree roots), roll out a layer of professional-grade landscape fabric. I use this stuff from Gardner’s Supply Company; it’s strong enough that you can’t poke a shovel or a plant root through it, but permeable enough to let air and water pass freely. To secure the fabric to the ground, use earth staples from Gardener’s (OKAY, I used to work there, but I swear by most of the stuff they sell), or cut some wire hangers into pointed-end sections and make your own.
3. Build your bed frames. They need to be 10-12″ deep if you’re planting on top of fabric or a paved area, or they can be a little shallower if you’re placing the beds on top of workable soil. This is deep enough for most things any regular person would grow; if you’re going for daikon or long carrots, go a little deeper. We’ve stacked two 1″x6″ boards to build the sides of the beds. Four 4×4″ pieces, cut to the depth of the bed, are an easy way to secure the corners.
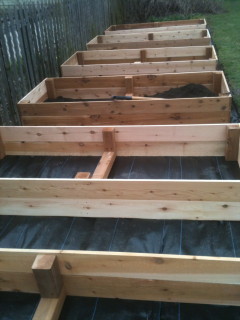
These are six 3×7′ frames minus the dirt.
Cedar is more expensive than pine, but will last twice as long. Don’t use treated wood; the chemicals will leech into the soil where you grow things to eat. Bad.
It isn’t wise to go more than 3 feet wide, or else it’s a bitch to reach the middle of the bed for weeding and harvesting. Length can vary based on your space; we’ve done anywhere from 6′ long to 9′ long. Every three feet or so, you’ll want to install a cross-board to keep the sides of the bed from bowing out under the pressure of the soil. Use the same 4×4″ pieces from the corners, and just secure a board underneath to join the sides.
4. Place the frames where you want your beds. Ideally on top of that flat, sunny, well-drained spot you identified before. Don’t worry if they’re not perfectly level; once you pour dirt in, they’ll say put. Unless you’re on a sloping hill, which would mean you didn’t read the first point. Leave 12-18 inches between the beds so you can walk and squat between them to water, weed, and harvest.
5. Fill them with dirt. A blend of 50/50 organic topsoil and mature compost is awesome if you can get it. Fill the beds to the top and mound the soil in the center by a few inches; it’ll settle once you plant and water. If you’re not planting right away, or, if you’re direct-sowing seeds, consider laying down sections of chicken wire to keep cats from using your new garden space as a litter box and squirrels from digging up garlic bulbs and onion starts to eat.
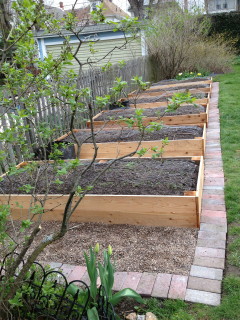
Filled beds with brick border and pea gravel walkways. My sister calls them “the graves.”
6. Address the walkways. There are a few options for what to do between the beds, but all of them involve creating a walking path that will also drain heavy rainfall and keep weeds down. Crushed stone, pebbles, bricks, or pavers over landscape fabric offer the most permanent solution, but a thick layer of mulch or straw with newspaper underneath will work for one season, too. If your beds border the lawn, consider a way to make mowing easier for yourself. A line of bricks recessed into the ground makes it easy for mower wheels to run close to the beds, trimming the grass while steering clear of the bed frames.
7. That’s it, really. It’s a bit of investment in wood, soil, and path material to start, but you’ll have them for a decade or more. If you’re renting, don’t be afraid of less permanent arrangements that fit the above criteria – level, sunny, 10-12 inches deep, with access to water. It could be a grid of Rubbermaid bins, burlap sacks, untreated shipping crates, bathtubs, or a series of galvanized pails. Same difference, no shame.
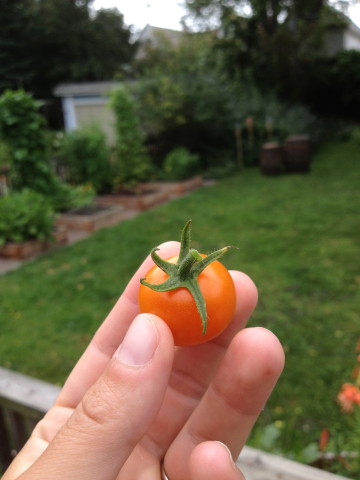
A sungold cherry tomato from our Buffalo raised bed garden (pictured behind, bean pole teepees looking like Christmas trees). I didn’t take one photo of the gardens themselves last year. Duh.